Showing posts with label painting. Show all posts

Tuesday, April 2, 2013

Updates and a few Sneak Peeks!

Well folks, things are wrapping up here at the Clark Castle.  Our renovation to-do list has been dwindling down to just a few more things, and then we'll be ready to sell.  Our realtor is chomping at the bit to list, and apparently it's a huge seller's market right now and our neighborhood is prime real estate, so when we list on May 1st, we'll be in the height of the season.  She doesn't think it'll be on the market two weeks.

It seems like everything is working out!  And I'm ready for it all to be done, you guys!  We've got a month to finish up the following list:

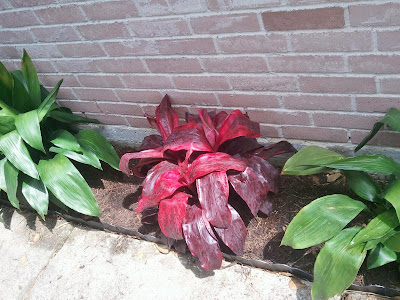
  1. Finish landscaping front yard.  Replace dead peace lillies (that was try numero two after the snapdragons got a fungus and died) with new shrubs.  Weed like the dickens.  Mulch until you can't mulch no more.  I finally finished this on Sunday!  Whoo hoo!  Hopefully I will not have to do more than remulch when we list.
  2. Landscape back yard - I basically just want to kill the fire ants and dig up the weeds in the already-created landscaping area around the tree in the backyard.  It's going to be a challenge which is why I have dodged it repeatedly, but this weekend I bought some established yellow hibiscus and hope to plant them next weekend, along with completing #4 and/or #6.
  3. Get the horrible white McLazy paint job off the powder-room cabinets - Done! Pictures upcoming.
  4. Test out the Rustoleum Cabinet Transformations Wood Finishing System on the powder room cabinets, to determine if it looks good enough to do everywhere else.
  5. If 4 is a yes, apply Rustoleum to the bathroom cabinets (and maybe the kitchen cabinets, depending on how easy the former is).  If 4 is a no, figure something else out.
  6. Strip the paint off the banister, sand the crap out of it, and repaint it so that it doesn't look like a 9 year-old painted it.  I've been stripping this for over a week (giving time in between for it to air out).  It got so gunky that I had to buy the paint stripper wash to get all of it off so I could see what's left, but that stuff needs massive ventilation so, yeah.  Learned that the hard way.  More on that story at 10.
  7. Finish the white trim upstairs. This is mostly finished, but it needs one more coat.
  8. Finish painting all the doors.  ALL THE DOORS.  Or at least all the ones upstairs, because they are the only ones left since all other 85 of them have already been painted.
  9. Paint the laundry room cabinets
  10. Paint the downstairs closets, which we can't really do until we complete items 1 and 2 from #10
  11. Paint the garage, for the same reason
  12. Sell everything we don't need, move everything out, and get it on the market!
That seems like a lot, but comparatively?  Not so much.

So, just a few sneak peeks at what's coming up!


Thursday, December 29, 2011

Master Bath - Painting Complete!

Well, it's finally done!

For those looking: I chose Martha Stewart Living's Tadpole Green, color-matched to Behr Premium Plus Ultra.  I could have gotten away with one coat and a little touch-up, but I did two full coats, and it covered beautifully. 

Before - when we moved in
After (but before I touched-up the edges)

Before - when we moved in
After - new floors, new toilet, and the new sheet-rock in place

Before - when we moved in
After
Wow, that's a remarkable improvement over how it looked when we moved in!

After - with door replaced with sheet-rock and made into a walk-through

Before - during renovations
After!
Before - After we replaced the cabinetry


After!
 Of course it looks darker because it's night-time, there's no ambient lighting (the lighting over the vanity is missing), and there's no mirror to reflect light...but trust me.  It's beautiful.  :)

Here's a shot of it right next to the tile.  You can see that it brings out all the light-greens in the tiles while still being a great complement to the overall room.


This is probably the best color-for-color shot of the green.  This is what color it looks like in person, and it looks great against the tile!  It was difficult to find a green that worked with the dark, tight space of the powder room but also warmed up the room and looked great against the large, bright space of the main bath area.

As you can see from this area, we will need to replace the baseboard trim.  :)

So, what do you think?  Sadly I get home way after dark so I can never take any bright pictures, but trust me.  It's beautiful.  :)

Now all that's left is painting and putting down baseboards throughout, building the cabinetry, painting the cabinets, putting the mirrors up (i.e. finding a mirror for the main bath area), shopping for new light fixtures, figuring out the towel-rack situation, and covering up the patio door with some kind of window blind.  Wow, that sounds more daunting than originally thought. 

Next up: Upstairs bathroom painting, and gardening this weekend.

Tuesday, December 27, 2011

Sneak Peek

I have to do some ceiling touch-ups (hopefully tonight) and remove all the tape/plastic sheeting before I can post an official "complete" picture, but here's a sneak peek at the bathroom!

The green is so fabulous.  Beyond words.  It looks amazing in person.

Powder room, where mirror should be
Comparison of tile beside new paint (ignore the tape separating them)

A peek into the powder room from the shower area (ignore the tape!)

More pictures soon!

Hope you all had a great holiday, whatever you were celebrating.

Friday, December 23, 2011

Getting Primed

So I taunted you all with primer pics, and now I shall deliver!

Except, pictures of white walls are boring, and there's not really a lot to say about them.  "Ooooh, they're...primed and ready for paint!  Yay!"  Boring.  Painting walls white is boring.

Before
After

Vanity

Medicine cabinet

Walk-through to powder room


From powder room - notice freshly-painted ceiling!


 After priming, I went ahead and painted the ceiling last night (Glidden Ceiling Paint - it was the cheapest, and it seems to actually cover better than a lot of more expensive ceiling paints.  It only required one coat to achieve a nice, even white).

Newly-textured area above shower

Main bathroom ceiling - looks sooooo good
 You may not remember how the ceiling in the powder room looked before I painted it, but it was pretty terrible.  I took a full hour on it with a belt-sander to mow it down to a manageable amount, but there were random chunks taken out of the wall where the original stalactites used to live.  Now it's all nice and even.  :)

Over sink

Over toilet
Today is time to slap on the green!  I'm so excited.

Thursday, December 22, 2011

Two Tickets to Sheet-Rock Town!

As mentioned in my previous post, I have some free time off work with the holidays coming up, and if Husband and I don't end up going on an unplanned vacation for New Years (which, let’s be honest, is not out of the question), my intent is to spend this time off gardening.  I haven't had a lot of time to garden in recent weeks, given the weekends have been filled with trips to other cities (and states) to visit family and friends, and after work is impossible given I’m home well after dark.  I’d planned on getting started on the gardening for this weekend (since I have a three-day weekend off – thanks, Christmas!), but something kind of awesome and exciting has come up:

We just got the bathroom sheet-rocked and re-textured.

That means finally being able to paint!!  Yay!  I love painting.  I had been sitting on my paint colors for about three months, waiting for us to drum up the money (or more accurately, be bothered to call someone to come out) to get it finished.  We found an awesome guy who, unlike all of the other sheetrock guys we called, actually showed up when he said he would, and did a fine job.

To prep for his arrival, we had to rip out the door-frame that led from the powder room to the main bath, and we decided that while we liked the chair rail, it didn't go with the rest of the house (as there was not another chair rail anywhere else in the entirety of the house...why is it in the powder room?), so we ripped it out as well.  (And by "we", I mean Husband.)

Let’s have a little reminder of how it used to look, for all of those who’ve (understandably) forgotten:

Missing medicine cabinet that needs to be filled in


Above you can see where the door-frame and chair rail were removed, as well as the spot where the McLazies "fixed" the wall
So to sum up, we needed to fill in the hole where the medicine cabinet was removed, have the wall behind the bathtub/just right of the toilet repaired (see above), fix the area where we removed the door between the powder room and the main bathroom, and texture the ceiling and wall where Husband replaced the bathtub with the shower setup (no pictures of before, sorry!).

Because he’d have to texture the walls where he made repairs, we elected to just have him re-texture all of the walls.  This worked for me, because the wall texture was remarkably different between the two rooms.  The main bathroom area had almost no texture whatsoever (which I liked), but the powder room had that same horrifying, will-cut-your-hand-if-you-touch-it texture.  Even after I spent eons sanding it down, it was still pretty hard core and looked bad.  So he re-textured it all with a nice stomp-grind.  Here are the results:

The powder room

More powder room

Powder room, mirror side
The walk-through
Walk-through from the main bath
Medicine cabinet no more!

Shower-area ceiling retexture

Now you may have noticed something special here in the previous picture.  This was my favorite part of this whole process...the ceiling was retextured too!!

A better picture of the ceiling and wall together


I literally cannot express my joy enough at this ceiling.  SO EXCITING!  It was like Christmas morning when I walked in and saw that the horrible semi-gloss and stalactite ceiling was gone, and replaced with it was this beautiful, evenly-coated ceiling.  Pure joy, y'all.


We put a coat of primer on last night (Husband helped, and it cut down on the completion time considerably), which I will post pictures of tomorrow.  Tonight, if all goes well, I will be putting the first coat of official paint on!  Yay!


Stay tuned for primer shots!


Monday, June 6, 2011

Warm Me Up, Scotty

So Saturday, here's what I did:

I took the office/potential-future-nursery from this:

Before - The "Pretend Shot"
I call this the "pretend shot" because it only looks like this nice, warm, buttery yellow when you get exactly the right angle at the right time of day with the exact right amount of sunshine streaming through the windows.  Not an accurate color.  It looks more like this:

Dingy, boring yellow
 In my removal of light-covers to paint, I also discovered that they used to have it navy-ish/bright blue.  Like, almost the exact same color of the painter's blue tape.  Witness:

Why?
But thankfully, this is no more.  Now?

Warm, sage green
This color is Glidden's Hazy Sage, color-matched to my trusty Behr Premium Plus Ultra Paint and Primer in One!
No more scrapes and bumps, no more dingy yellow

Soooo pretty!
It's impossible to get a true color match at night, and I haven't taken a photo during the day yet, but the best true color representation is here:


Yep, that's how I roll.  That's not quite the nail polish I was looking for, but hey.  It works.

Ooh, and I found another blogger who posted a pic of the same paint color on their walls.  This is it!
http://3388river.blogspot.com/

Meanwhile, during my painting escapades, husband solicited the help of his friend to help him with the shower.  I will post that separately because of all the work he's done! It deserves its own post for all the amazingness.

I will also post my Sunday/Monday progress separately because, whoa.  It was a doozy.