Showing posts with label in-progress. Show all posts

Tuesday, April 2, 2013

Updates and a few Sneak Peeks!

Well folks, things are wrapping up here at the Clark Castle.  Our renovation to-do list has been dwindling down to just a few more things, and then we'll be ready to sell.  Our realtor is chomping at the bit to list, and apparently it's a huge seller's market right now and our neighborhood is prime real estate, so when we list on May 1st, we'll be in the height of the season.  She doesn't think it'll be on the market two weeks.

It seems like everything is working out!  And I'm ready for it all to be done, you guys!  We've got a month to finish up the following list:

  1. Finish landscaping front yard.  Replace dead peace lillies (that was try numero two after the snapdragons got a fungus and died) with new shrubs.  Weed like the dickens.  Mulch until you can't mulch no more.  I finally finished this on Sunday!  Whoo hoo!  Hopefully I will not have to do more than remulch when we list.
  2. Landscape back yard - I basically just want to kill the fire ants and dig up the weeds in the already-created landscaping area around the tree in the backyard.  It's going to be a challenge which is why I have dodged it repeatedly, but this weekend I bought some established yellow hibiscus and hope to plant them next weekend, along with completing #4 and/or #6.
  3. Get the horrible white McLazy paint job off the powder-room cabinets - Done! Pictures upcoming.
  4. Test out the Rustoleum Cabinet Transformations Wood Finishing System on the powder room cabinets, to determine if it looks good enough to do everywhere else.
  5. If 4 is a yes, apply Rustoleum to the bathroom cabinets (and maybe the kitchen cabinets, depending on how easy the former is).  If 4 is a no, figure something else out.
  6. Strip the paint off the banister, sand the crap out of it, and repaint it so that it doesn't look like a 9 year-old painted it.  I've been stripping this for over a week (giving time in between for it to air out).  It got so gunky that I had to buy the paint stripper wash to get all of it off so I could see what's left, but that stuff needs massive ventilation so, yeah.  Learned that the hard way.  More on that story at 10.
  7. Finish the white trim upstairs. This is mostly finished, but it needs one more coat.
  8. Finish painting all the doors.  ALL THE DOORS.  Or at least all the ones upstairs, because they are the only ones left since all other 85 of them have already been painted.
  9. Paint the laundry room cabinets
  10. Paint the downstairs closets, which we can't really do until we complete items 1 and 2 from #10
  11. Paint the garage, for the same reason
  12. Sell everything we don't need, move everything out, and get it on the market!
That seems like a lot, but comparatively?  Not so much.

So, just a few sneak peeks at what's coming up!


Friday, December 23, 2011

Getting Primed

So I taunted you all with primer pics, and now I shall deliver!

Except, pictures of white walls are boring, and there's not really a lot to say about them.  "Ooooh, they're...primed and ready for paint!  Yay!"  Boring.  Painting walls white is boring.

Before
After

Vanity

Medicine cabinet

Walk-through to powder room


From powder room - notice freshly-painted ceiling!


 After priming, I went ahead and painted the ceiling last night (Glidden Ceiling Paint - it was the cheapest, and it seems to actually cover better than a lot of more expensive ceiling paints.  It only required one coat to achieve a nice, even white).

Newly-textured area above shower

Main bathroom ceiling - looks sooooo good
 You may not remember how the ceiling in the powder room looked before I painted it, but it was pretty terrible.  I took a full hour on it with a belt-sander to mow it down to a manageable amount, but there were random chunks taken out of the wall where the original stalactites used to live.  Now it's all nice and even.  :)

Over sink

Over toilet
Today is time to slap on the green!  I'm so excited.

Thursday, December 22, 2011

Two Tickets to Sheet-Rock Town!

As mentioned in my previous post, I have some free time off work with the holidays coming up, and if Husband and I don't end up going on an unplanned vacation for New Years (which, let’s be honest, is not out of the question), my intent is to spend this time off gardening.  I haven't had a lot of time to garden in recent weeks, given the weekends have been filled with trips to other cities (and states) to visit family and friends, and after work is impossible given I’m home well after dark.  I’d planned on getting started on the gardening for this weekend (since I have a three-day weekend off – thanks, Christmas!), but something kind of awesome and exciting has come up:

We just got the bathroom sheet-rocked and re-textured.

That means finally being able to paint!!  Yay!  I love painting.  I had been sitting on my paint colors for about three months, waiting for us to drum up the money (or more accurately, be bothered to call someone to come out) to get it finished.  We found an awesome guy who, unlike all of the other sheetrock guys we called, actually showed up when he said he would, and did a fine job.

To prep for his arrival, we had to rip out the door-frame that led from the powder room to the main bath, and we decided that while we liked the chair rail, it didn't go with the rest of the house (as there was not another chair rail anywhere else in the entirety of the house...why is it in the powder room?), so we ripped it out as well.  (And by "we", I mean Husband.)

Let’s have a little reminder of how it used to look, for all of those who’ve (understandably) forgotten:

Missing medicine cabinet that needs to be filled in


Above you can see where the door-frame and chair rail were removed, as well as the spot where the McLazies "fixed" the wall
So to sum up, we needed to fill in the hole where the medicine cabinet was removed, have the wall behind the bathtub/just right of the toilet repaired (see above), fix the area where we removed the door between the powder room and the main bathroom, and texture the ceiling and wall where Husband replaced the bathtub with the shower setup (no pictures of before, sorry!).

Because he’d have to texture the walls where he made repairs, we elected to just have him re-texture all of the walls.  This worked for me, because the wall texture was remarkably different between the two rooms.  The main bathroom area had almost no texture whatsoever (which I liked), but the powder room had that same horrifying, will-cut-your-hand-if-you-touch-it texture.  Even after I spent eons sanding it down, it was still pretty hard core and looked bad.  So he re-textured it all with a nice stomp-grind.  Here are the results:

The powder room

More powder room

Powder room, mirror side
The walk-through
Walk-through from the main bath
Medicine cabinet no more!

Shower-area ceiling retexture

Now you may have noticed something special here in the previous picture.  This was my favorite part of this whole process...the ceiling was retextured too!!

A better picture of the ceiling and wall together


I literally cannot express my joy enough at this ceiling.  SO EXCITING!  It was like Christmas morning when I walked in and saw that the horrible semi-gloss and stalactite ceiling was gone, and replaced with it was this beautiful, evenly-coated ceiling.  Pure joy, y'all.


We put a coat of primer on last night (Husband helped, and it cut down on the completion time considerably), which I will post pictures of tomorrow.  Tonight, if all goes well, I will be putting the first coat of official paint on!  Yay!


Stay tuned for primer shots!


Wednesday, November 23, 2011

The Front Yard Garden, Part Two


So I took a break from the garden, mostly because we had stuff to do for a few weekends, and with it being dark an hour before I get home from work every day, it made weekday gardening impossible.  So, last weekend, I was determined to get a good bit of gardening done. 

My intent was to take the same work I'd done with the snapdragons and cast irons and continue the same theme around the front of the house.  Husband insisted that the front needed "some visual height" or whatever, so I did it for him if nothing else. 

Saturday morning, I went to the nursery to get more cast irons.  I'd also intended to go get 2-3 more snapdragon bushes to put around the mailbox, because that area needed to be spruced up badly.  Except the nursery I went to had crap for cast irons (they looked like they'd all been been on the losing end of a fight with a shiv and some hungry animals), and no snapdragons.  So I drove to the other nursery and voila, cast irons everywhere!  I also looked for some elephant ears to plant in the back yard (no, not the animal, but I know that's what you were thinking!), and ended up wasting a lot of time looking at palm trees instead.  Still no snapdragons, so I was starting to go into panic mode.

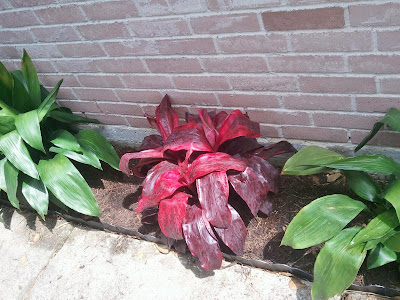
Then the lovely nursery guy was like, "These Cyclamids will do well for your winter garden, and they're on sale!" Done.  I bought 8 when I was sure I only needed 5, but I was sure I'd find a place for the other three somewhere.  (And I did.) 

Purchases complete, I drove home, prepared for some gardening!  I decided to start with the mailbox.  Why you ask?  Let me explain.

When we purchased the house, we did not have a mailbox.  Well, technically we were provided one, if you count a mailbox with a broken post laying in the middle of your newly-purchased yard as "provided".  Some jerkfaces must have decided that knocking down the McLazies' mailbox was a lesson learned.  (I honestly don't blame them, y'all.)  Regardless, we had to buy one of the cheap plastic ones, and then randomly knock the tiny, cheap piece of wood into the ground, where it wobbled perilously around every time you opened or closed the mailbox.  It needed an intervention.

So I dug up the area where I planned to place the new mailbox.  I do not have progress photos, because I was covered in dirt and my phone died twenty minutes into the process.  I only have after photos, but trust me.  It sucked.  At least this time, I had a wheelbarrow, so that was a definite improvement.  After I got rid of the crap topsoil and dug out enough good dirt to mix with the garden soil, I knocked the mailbox into its rightful place (with the butt of the shovel, because that's all I had on hand.  I'm a resourceful gal), then started adding the soil back.  To ensure the mailbox stayed in place, I hard-compacted the soil around the mailbox post and then wet the soil enough to make it stay put.  It worked, and apparently my mailman was extremely pleased, because he drove by at that time and looked at me like I'd just handed him some freshly-baked double chocolate chunk cookies.  He was like, "Yes!  This is good!  Your old mailbox was very wobby."  New favorite word.

Once the soil was down, I started planting the cyclamids.  By "planting", I mean arranging them just so, getting a ruler to ensure they were evenly spaced, then starting to dig more and discovering that there were about eleventy billion huge rocks down deeper than I had dug, making planting impossible.  Super awesome.

Those three loose rocks?  Dug them up.

Also dug up these four rocks.  ALL FROM ONE LOCATION.
 I took comfort in the knowledge that at least I wasn't digging up dead bodies.  I honestly wouldn't put it past the McLazies.

So anyhoo, I planted everything on Saturday and then once I was done, I realized I hadn't put enough of the soil in, so I had to take them out, put the rest of the soil in, and then repeat the process.  Then I spent an hour making the damn garden border, and mulching.  Final product?  Worth it, I think:

The mailman will be so pleased!


The best part so far is that they still haven't died yet.  It's been almost a whole week and they still seem really perky.  The pink one on the far right was laying down like it was dead yesterday, but this morning it was perkier than it was in this picture, so...way to play me, pink cylamid!  

The snapdragons are not faring as well.  I don't think we planted them with enough soil mixture, and apparently they needed a lot of aeration which doesn't work for clay soils (which I have).  Still, they are alive.  They just aren't budding...except for one.  


The rest of them look like this:


Sigh.  So I dead-headed them (which apparently means to cut the buds off once the flowers have spent), except I did so about a week past when they needed to be done.  Le sigh.

The only solace I can provide these poor fellas is that I have purchased a circular stake that will hold them up, so at least they'll look like they want to be alive instead of being spread out like a five year old who hasn't brushed their hair in six weeks.

While I was in prune-mode, I pruned all of the cast irons and the palm tree of any dead material.  Only green is demanded here at the Clark Castle. 

Before (before we even moved in, but you get the point.  There was yellow everywhere):


After:

Much better.

After all of this, I began to dig.  And dig.  And dig.

I dug up the random growth seen above at the bottom corner of the picture (which turned out to be a tuber of some kind, which looked enough like a daylily that I will now call it such).  I dug up some atrociously unruly weeds with roots deeper and wider than some trees.  I dug up a large (and this term doesn't do it justice, because it's everywhere) patch of clover-like groundcover, and raked up about ninety pounds of pine needles.  Basically, I turned this:


Into this:


Then I saw a snake come out at me from a burrow. It was a blind snake, so after my initial shock and thanks to Google, I realized we were cool and quietly got back to work, until I ran out of wheelbarrow room and couldn't move it because it was too heavy.  Good work, Taylor.  Now I refer my husband to the front yard to handle the removal of dirt.  This is why I have him.

And later that night, I discovered that I pinched a nerve somewhere that made the inside of my left arm all the way to my fingertips filled with shooting pain, pins and needles, and varying degrees of numbness. 

I hate you, gardening!  But I WILL PREVAIL. 

Part three, hopefully coming soon!  Here's a sneak peek of my plan:

Thursday, June 23, 2011

Knock on Wood

Or in our case, the lack thereof.

We were told that the guys were coming out Wednesday (yesterday) to install the wood.  So Husband and nephew came over and they went Team Power Activate. 

Now this is what the living room looked like on Move-In-Day:


This is what it looked like Monday:


Yeah.  What happened?  Renovation happened, that's what.

When I got home, this is what it looked like:

Apparent proof that my husband is indeed part panther.

Good work, boys.  (Despite that the scent they kicked up smelled akin to a dead mildew monster hiding under the wood slats)

Of course on Wednesday, it rained here.  Heavily.  After like, 7 months (slight exaggeration) without rain.  The one day that they have to come and install an item that cannot have water on it.  Sigh.  They came anyway, but only to float the ground (badly) and leave on every light and fan in the house.  Oh, and leave the house unlocked.

Then today, they were presumably supposed to show at like, 9am.  They showed at 1:40pm.  Winning!

I don't even know if they're installing wood or just drink all our sodas.  But I'm excited to see the finished product.  Are you?

Wednesday, June 22, 2011

Tile and Grout and Counter Me, Baby

So...

The bathroom granite is in.  A makeshift (clearly temporary) cabinet has been made for the master bath.  Most excitingly, the tile is finished...which means the shower is finished!  But perhaps most importantly (but not most excitingly), the toilet is also in.  Yawn, but whatever, it's a necessity.

So, pictures?  Yes.

Before
After!  (But before the granite guys had cleaned it off)

Granite + New Faucets and Sinks = Awesome!

One of our good friends built this cabinet in like, twenty minutes.  I love that in addition to being dual sinks, it sits higher up (comes just above waist level on me, and i'm about 5'8).  I've always hated bending halfway over just to wash my hands, and it also gives it a feeling of being firmly seated in the ADULT category.  I can't imagine any three-year-olds coming in here to wash finger paint off their hands.  (And thank goodness for that!)

Here was the model that our buddy had to work with:

Husband make good drawing

Anyway!!  Onward with pictures, right?  Who cares about drawings of cabinets.

New flooring (pre-grout) in the powder room


Powder Room Before

Minus faucets that were later installed
This is actually a photo of the upstairs bathroom, but who cares?  It looks the same.

Before


After

There's actually a lot of drama about this one.  I wanted a dual-flush toilet for the ever.  I hunted, searched, price-shopped, read reviews, etc etc.  Found the perfect one (as you may have remembered from previous post).  Except, it didn't fit.  It was a 12" rough-in, which is a standard size on like, 90 bagillion homes.  Except no, the 12" rough in standard toilet that is the only thing sold anywhere ever?  Doesn't fit.  This is a 10" rough in.  Which means I had to special-order this sucker and get it shipped.  It's still a pretty awesome (high-efficiency) toilet though, it's just a regular-flushy toilet instead of the cool "push a button" toilet.  Le sigh.  But that just means that our guests will get to use the awesome dual-flush toilet of awesome.


I'm stalling on purpose, because I know this is totally the moment you've totally been waiting for, AMIRITE?!  Without further adieu, I bring you.....THE MASTER SHOWER!

Before
And now....

Fully installed in all its amazing glory - check out that ceiling!

This one shows more of the flooring and the step


How awesome is this border?  This (in addition to the bronze squares in the kitchen backsplash) was another small point of contention between Husband and I.  I liked this, but i liked other stuff better.  I thought this was a little too girly.  (I mean, c'mon, it has flowers.)  I wanted a rope-looking Greco-Roman distressed border, but it just hung out too far from the wall and, given how clumsy I am without the addition of slippery, watery surfaces (the bathroom floor is in no way slippery, but this baby giraffe will still find a way), we figured we shouldn't install anything that I could potentially knock myself unconscious with.  There were plenty of other selections, but this was the only other one that had that Greco-Roman Ruins look to it and it matched everything perfectly, so we went for it.  Glad we did, because it looks amazing. I also love that it bifurcates the straight-tile and the diagonal tile.  It's such a classy look to me.


Here's a shot of the shelf.  I don't know why they didn't install two, and I think it looks weird without the second one, but I guess Husband didn't think to ask when it was being installed and like the sink, they probably didn't come fully prepared and just hoped we didn't say anything.  It's still big enough to put the stuff we need on it and I kind of like that we don't have a ton of shelf space to put a whole bunch of crap.  Keeps it looking nice.  :)  I also totally love that the shelf has that unfinished surface-feel to it which is supposed to detract from soap scum, hard water, and other shower-ailments.  Score!

And can I just say?  The tile guy was spectacular.  Not only did they install this stuff and kind of go the extra mile, but they went out of their way to give everything such a seamless look.  Witness:


Yeah, they cut the tile to look like that.  It gives the overall look such a polished and clean appeal.

I know I've said it a lot already but, I've found my new favorite item in the house.  It's so amazing to just be in love with so many aspects of your home and be excited to come home and play with it.  :)  Here's hoping the newness doesn't wear off anytime soon.

And after us trying it out together last night (minus glass door, of course - that's in the purchase queue), I gotta say, I don't think I'm going to hear anymore complaints from Husband about not having room in the shower.  Totally. Freaking.  Awesome.

Y'all are all welcome to come over and shower!  Just pitch in for the water bill. : )