Tuesday, April 2, 2013

Updates and a few Sneak Peeks!

Well folks, things are wrapping up here at the Clark Castle.  Our renovation to-do list has been dwindling down to just a few more things, and then we'll be ready to sell.  Our realtor is chomping at the bit to list, and apparently it's a huge seller's market right now and our neighborhood is prime real estate, so when we list on May 1st, we'll be in the height of the season.  She doesn't think it'll be on the market two weeks.

It seems like everything is working out!  And I'm ready for it all to be done, you guys!  We've got a month to finish up the following list:
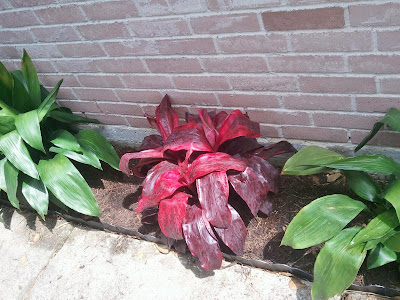
  1. Finish landscaping front yard.  Replace dead peace lillies (that was try numero two after the snapdragons got a fungus and died) with new shrubs.  Weed like the dickens.  Mulch until you can't mulch no more.  I finally finished this on Sunday!  Whoo hoo!  Hopefully I will not have to do more than remulch when we list.
  2. Landscape back yard - I basically just want to kill the fire ants and dig up the weeds in the already-created landscaping area around the tree in the backyard.  It's going to be a challenge which is why I have dodged it repeatedly, but this weekend I bought some established yellow hibiscus and hope to plant them next weekend, along with completing #4 and/or #6.
  3. Get the horrible white McLazy paint job off the powder-room cabinets - Done! Pictures upcoming.
  4. Test out the Rustoleum Cabinet Transformations Wood Finishing System on the powder room cabinets, to determine if it looks good enough to do everywhere else.
  5. If 4 is a yes, apply Rustoleum to the bathroom cabinets (and maybe the kitchen cabinets, depending on how easy the former is).  If 4 is a no, figure something else out.
  6. Strip the paint off the banister, sand the crap out of it, and repaint it so that it doesn't look like a 9 year-old painted it.  I've been stripping this for over a week (giving time in between for it to air out).  It got so gunky that I had to buy the paint stripper wash to get all of it off so I could see what's left, but that stuff needs massive ventilation so, yeah.  Learned that the hard way.  More on that story at 10.
  7. Finish the white trim upstairs. This is mostly finished, but it needs one more coat.
  8. Finish painting all the doors.  ALL THE DOORS.  Or at least all the ones upstairs, because they are the only ones left since all other 85 of them have already been painted.
  9. Paint the laundry room cabinets
  10. Paint the downstairs closets, which we can't really do until we complete items 1 and 2 from #10
  11. Paint the garage, for the same reason
  12. Sell everything we don't need, move everything out, and get it on the market!
That seems like a lot, but comparatively?  Not so much.

So, just a few sneak peeks at what's coming up!


Wednesday, October 10, 2012

Aaaand we're back!


So, for all my (one) fans who weren’t already friends when this page was created, you may be wondering where the heck I went. 

I explain it all in detail on my non-renovation blog, but suffice to say: Broken collarbones requiring plates are not conducive to expedient home renovation.

For months, I couldn’t do anything as physical as painting, unless I wanted to use my off-hand and potentially mess up an otherwise perfect cut-in (which I DID NOT, thankyouverymuch).  Landscaping was the other big To Do on our list, but that was definitely not an option for many months.  When I started to be able to physically renovate again, I just plain didn’t want to.  Laziness was a warm, soft blanket and I cuddled the crap out of it.

But then, common sense set in.  We had to get the painting done, and we had to get the landscaping done.  Then…it might be ready to be flipped!  And we wanted to flip it by the end of the year, so we needed to get moving.

So, we’re firing up the renovations and, thusly, firing up the blog again!  And there is much to update.  So many new posts for the future!  It’s very exciting to be rounding the bend to finishing renovation on a house.  I really hope whoever buys it enjoys it as much as (or more than) we did!  It’s a cute lil’ thing.

So first up: Saturday Landscaping! 

But first, a question for you all:  After we had our realtor come over to see what she thought of the changes, she also tacked on that it might be a good idea to redo the kitchen cabinets (but she was waffling on the necessity of doing it).  I’m personally going to wait until we get the master bath cabinets built, use the Rust-O-Leum Cabinet Transformation, and see how I like it.  If it’s easy and cheap enough, I’ll probably do it, because then it would be a completely redone kitchen.  :)  If it is a pain in the butt, they can stay the way they are.  :)  Have you had any positive or negative experiences with Rust-O-Leum?

Thursday, December 29, 2011

Master Bath - Painting Complete!

Well, it's finally done!

For those looking: I chose Martha Stewart Living's Tadpole Green, color-matched to Behr Premium Plus Ultra.  I could have gotten away with one coat and a little touch-up, but I did two full coats, and it covered beautifully. 

Before - when we moved in
After (but before I touched-up the edges)

Before - when we moved in
After - new floors, new toilet, and the new sheet-rock in place

Before - when we moved in
After
Wow, that's a remarkable improvement over how it looked when we moved in!

After - with door replaced with sheet-rock and made into a walk-through

Before - during renovations
After!
Before - After we replaced the cabinetry


After!
 Of course it looks darker because it's night-time, there's no ambient lighting (the lighting over the vanity is missing), and there's no mirror to reflect light...but trust me.  It's beautiful.  :)

Here's a shot of it right next to the tile.  You can see that it brings out all the light-greens in the tiles while still being a great complement to the overall room.


This is probably the best color-for-color shot of the green.  This is what color it looks like in person, and it looks great against the tile!  It was difficult to find a green that worked with the dark, tight space of the powder room but also warmed up the room and looked great against the large, bright space of the main bath area.

As you can see from this area, we will need to replace the baseboard trim.  :)

So, what do you think?  Sadly I get home way after dark so I can never take any bright pictures, but trust me.  It's beautiful.  :)

Now all that's left is painting and putting down baseboards throughout, building the cabinetry, painting the cabinets, putting the mirrors up (i.e. finding a mirror for the main bath area), shopping for new light fixtures, figuring out the towel-rack situation, and covering up the patio door with some kind of window blind.  Wow, that sounds more daunting than originally thought. 

Next up: Upstairs bathroom painting, and gardening this weekend.

Tuesday, December 27, 2011

Sneak Peek

I have to do some ceiling touch-ups (hopefully tonight) and remove all the tape/plastic sheeting before I can post an official "complete" picture, but here's a sneak peek at the bathroom!

The green is so fabulous.  Beyond words.  It looks amazing in person.

Powder room, where mirror should be
Comparison of tile beside new paint (ignore the tape separating them)

A peek into the powder room from the shower area (ignore the tape!)

More pictures soon!

Hope you all had a great holiday, whatever you were celebrating.

Friday, December 23, 2011

Getting Primed

So I taunted you all with primer pics, and now I shall deliver!

Except, pictures of white walls are boring, and there's not really a lot to say about them.  "Ooooh, they're...primed and ready for paint!  Yay!"  Boring.  Painting walls white is boring.

Before
After

Vanity

Medicine cabinet

Walk-through to powder room


From powder room - notice freshly-painted ceiling!


 After priming, I went ahead and painted the ceiling last night (Glidden Ceiling Paint - it was the cheapest, and it seems to actually cover better than a lot of more expensive ceiling paints.  It only required one coat to achieve a nice, even white).

Newly-textured area above shower

Main bathroom ceiling - looks sooooo good
 You may not remember how the ceiling in the powder room looked before I painted it, but it was pretty terrible.  I took a full hour on it with a belt-sander to mow it down to a manageable amount, but there were random chunks taken out of the wall where the original stalactites used to live.  Now it's all nice and even.  :)

Over sink

Over toilet
Today is time to slap on the green!  I'm so excited.